Vertical antenna designer
Design a vertical antenna for portable use. Vertical antennas for portable use are designed for one principal HF/VHF/UHF amateur band only; they have an advantage over other types of antenna in that they receive and transmit omni-directionally, i.e. in all directions. Radiation patterns in elevation typically show low-angle vertically-polarized radiation, so verticals can be very good DX antennas, especially when used in open areas free of vertically-oriented conducting objects like trees, etc. Read more...
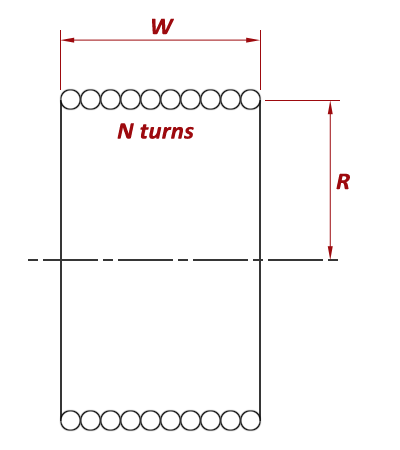
NEW This app now offers the user the opportunity to design a 1/4-wave vertical with a shortened vertical element, particularly suitable for use in the lower HF bands. This is accomplished by including a calculator to be used to define the dimensions and electrical properties of a loading coil specifically to compensate for the shortening of the vertical element.
Vertical antenna variants » » »
- 1/4-wave vertical, with configurable radials
-
2-element parasitic vertical array
- with multiple ground radials
- with two elevated radials per element
- 1/2-wave vertical, with configurable counterpoise
- 5/8-wave vertical, with configurable radials
A simple, efficient and popular antenna requiring a system of radials beneath the antenna. Well suited to both portable and fixed-station operation. The 1/4-wave vertical's radials can be laid out on the ground, with the feed-point at the ground, or with the feed-point raised and the radials sloping down from the feed-point toward, but not touching, the ground.
- Ground-mounted radials: 1 to 10 radials spaced equally on the ground, with lengths between 0.1λ and 0.2λ. Resonant frequency highly dependent on ground type and ground conditions.
- Sloping radials: the most-often quoted value given for sloping radials is 0.25λ or one-quarter wavelength. Resonant frequency much less dependent on ground type and ground conditions.
Each vertical uses its own set of the same number of radials laid on the ground. Resonant frequency highly dependent on ground type and ground conditions. For best results, remain within the recommended parameter ranges:
- Element spacing: 0.22–0.25 λ (0.24 λ recommended)
- Reflector length: 1.06–1.07 × driven element length
-
Radials per element: 4–6, all the same length, spaced equally and laid horizontally on the ground (very important!). The two sets are arranged so that the radials are interleaved rather than overlapping:
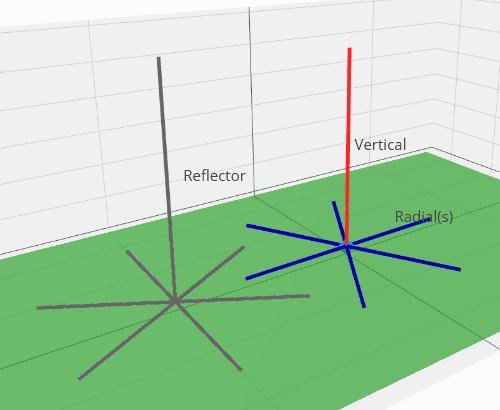
- Radial length: 0.16–0.18 λ
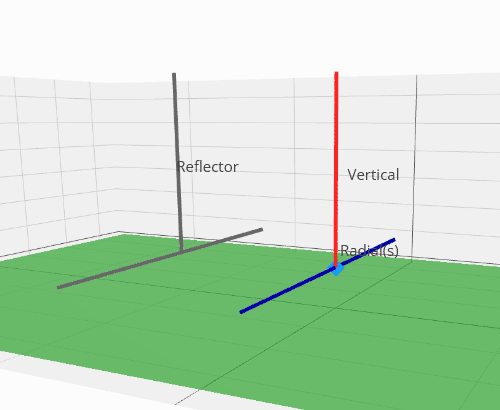
Each vertical uses two elevated radials, arranged parallel to one another in azimuth. Modelling indicates that a shorter reflector extension works particularly well with this configuration:
- Element spacing: about 0.25 λ
- Reflector length: about 1.02 × driven element length
- Radials per element: 2
- Radial length: about 0.25 λ
-
Radials arranged parallel to one another, approximately horizontally from the antenna feed-points. Set the height of the radials to about 1.0 or 1.5 meters for the mid- to high-HF bands, or somewhere between 1/50 to 1/20 of the wavelength for the lower HF bands.
Each of these arrays is considerably more sensitive to its design parameters than a single vertical. Element spacing, reflector length, radial system and ground characteristics all strongly influence its performance.
-
Under "First antenna section"
- set length to 50% of total
- set the angle to "not horizontal", and -90° (vertically downwards)
-
Under "Second antenna section"
- set the angle to "not horizontal", and +90° (vertically upwards)
- Set the support point ("Support pole height") to a minimum height of 1/4 wavelength plus two meters: the lower end of the antenna must be clear of the ground by at least two meters for safety reasons.
Get started » » »
- Use the controls on the left-hand side to configure your antenna - set the design frequency, antenna element lengths and angles, wire diameter, wire insulation if required, support height, etc.
- When you are happy with your configuration, press the "Show antenna" button to display your antenna in interactive 3D graphics mode in the area on the right-hand side. Each time you change your configuration, you should press the "Show antenna" button to register the changes to the app.
-
After you have configured your antenna, you can then use the controls further down in the page to generate charts and diagrams to evaluate
the antenna's performance - you will need to
scroll down in the page
to access these controls.
You can choose to view any combination of the available charts and diagrams: these include four radiation pattern types: azimuth, elevation, 3D and polarization patterns; other options include VSWR charts, an antenna currents diagram, and a Smith chart.
|
|
Set antenna color: |
|||||||||||||||||||||||||||||||||||||||||||||||||||||||||||||||||||||||||||||||||||||||||||||
|
Vertical antenna designer
portable-antennas.com
Antenna feed-point: ⬥
Load coil: ●
|
|||||||||||||||||||||||||||||||||||||||||||||||||||||||||||||||||||||||||||||||||||||||||||||
Antenna performance
Here you can generate plots of
radiation patterns,
VSWR chart, antenna currents diagram and Smith chart for your antenna over a
choice of ground types. By changing the physical dimensions of the antenna, and refreshing these plots, you can learn a lot about
how such antennas will perform in the field.
Please note that
radiation patterns are here modelled over flat ground -
when the antenna is erected on a hill-top or mountain summit, the surrounding sloping ground will generally cause angles in
the elevation radiation pattern to be lowered in the direction of the
slope: the steeper the slope, the lower the effective elevation take-off angle will be, and the better the chances of making
long-distance contacts.
Read more...
Note also that, for vertical antennas, the NEC engine used to generate the data for the elevation radiation pattern over-estimates the radiated gain at angles below the pseudo-Brewster angle specific to the antenna, ground type and frequency: this is due to unmodelled ground absorption effects. Below this angle, the gains are less, and often much less, than are presented in the elevation pattern.
|
Choose ground type of
land in the vicinity of the antenna: |
Conductivity:
S/m
Relative permittivity:
|
| View radiation patterns: |
|
| Choose type: | |
| Set ref. elevation angle: |
|
| Set ref. azimuth angle: |
|
| Impedance transformer: | unun |
| View VSWR chart: | |
| Effect of coax on VSWR: |
Coax length:
Type:
Effect of coax- and system-losses on VSWRWhen a coaxial cable is used to connect the antenna to a transmitter, the cable introduces signal loss, the magnitude of which can vary strongly with both frequency and antenna feed-point impedance. The main blue VSWR curve for this antenna is calculated at the antenna feed-point. The optional green curve represents the VSWR "seen" at the transmitter after losses in the coaxial cable are taken into account. At frequencies of antenna resonance, the blue and green curves usually coincide closely, since the coax contributes little additional attenuation at those frequencies. At frequencies away from resonance, however — often those corresponding to WARC bands — the feed-point impedance may become highly mismatched, producing very high VSWR values in the blue curve while the green curve shows substantially lower values. This reduction in VSWR at the transmitter occurs because signal losses in the coaxial cable attenuate both the forward and reflected waves. As a result, the reflected signal returning to the transmitter is weaker, causing the transmitter-end VSWR to appear lower than the actual feed-point VSWR. This effect can make some bands appear more "usable" from the transmitter's perspective, even though the antenna system may still be operating inefficiently at those frequencies. The green curve represents the "flattening" of the VSWR caused by the coax. Additional losses elsewhere in the system can further reduce the transmitter-end VSWR - these may include:
The magnitude of such losses, and their effect on actual radiated RF power, can only be estimated reliably through careful analysis of a particular antenna setup. In every-day portable operations, such losses can only be roughly estimated; however, comparisons can be made between commercially-produced EFHW and OCFD antennas for amateur radio use, and carefully-configured NEC models of those same antennas. Useful estimates can then be made of the efficiency of the commercial products by comparing their published VSWR curves, and the VSWR curves produced from the models. Improved transmitter-end VSWR therefore does not necessarily imply improved radiation efficiency: in some cases, a significant proportion of the transmitted power may simply be lost: dissipated as heat within the antenna system. Read more... |
| View currents diagram: | |
| View Smith chart: |
|
|
Antenna gains at 0° elevation: |
|
| Feed-point impedance: | |
| Estimated bandwidth: | |
 Web Hosting by Digital Ocean